Extension Springs to Torsion Springs: Why We Upgraded This Door (and When It Is Worth It)
Published · Written by Abdul, Lead Technician · Open Sesame Garages OKC
Converting a garage door from an extension spring and pulley system to a torsion spring system typically costs $400 to $800 installed and takes two to three hours. You get a safer failure mode, springs that can be ordered in high-cycle ratings, a door that lifts evenly instead of bouncing, and no pulleys or safety cables to inspect. It is worth doing on a heavy, frequently used, or shaky door — and it is not worth doing if your extension system is healthy or you are replacing the whole door soon.
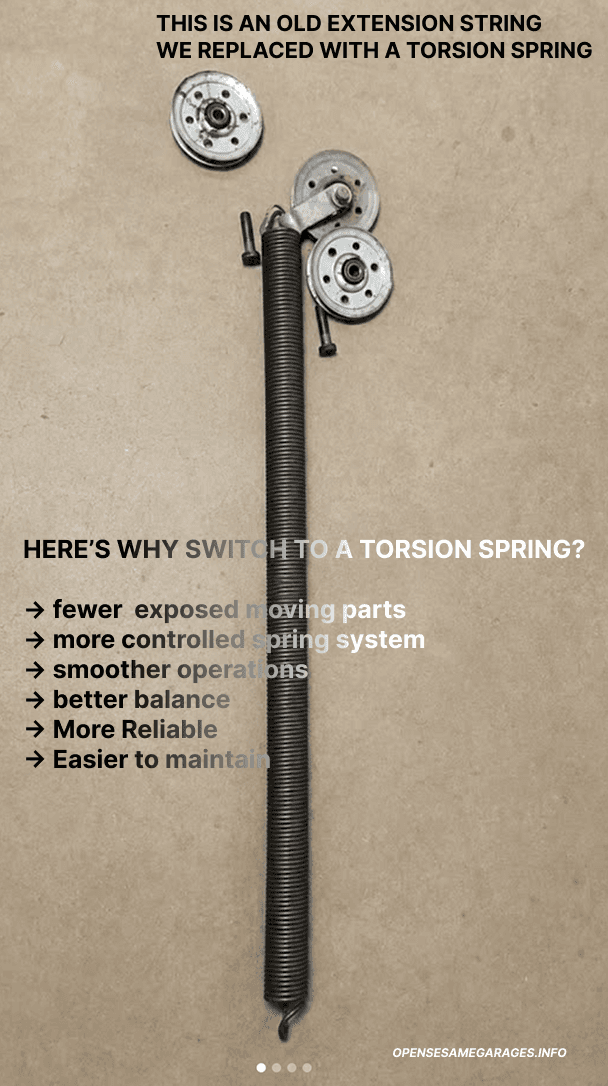
We finished this one first thing this morning. The door was running on the setup you find in a lot of older Oklahoma City homes: two extension springs stretched along the horizontal tracks, each pulling through a pulley and a lift cable, with a safety cable threaded down the middle. Nothing was broken. It just shook, bounced at the top of travel, and made the kind of noise that tells you the two sides are not lifting together.
By the end of the visit that hardware was gone and the door was hanging off a torsion shaft with a matched spring pair. Here is what changed, what it took, and how to decide whether the same upgrade makes sense for your door.
What is the difference between extension and torsion springs?
Both systems do the same job — counterbalance the weight of the door so a small motor, or your arm, can move something that weighs 150 to 300 pounds. They just store the energy differently.
Extension springs stretch. They run parallel to the horizontal tracks on each side of the door, and each one pulls its own cable through its own pulley. Two independent assemblies, working in rough agreement.
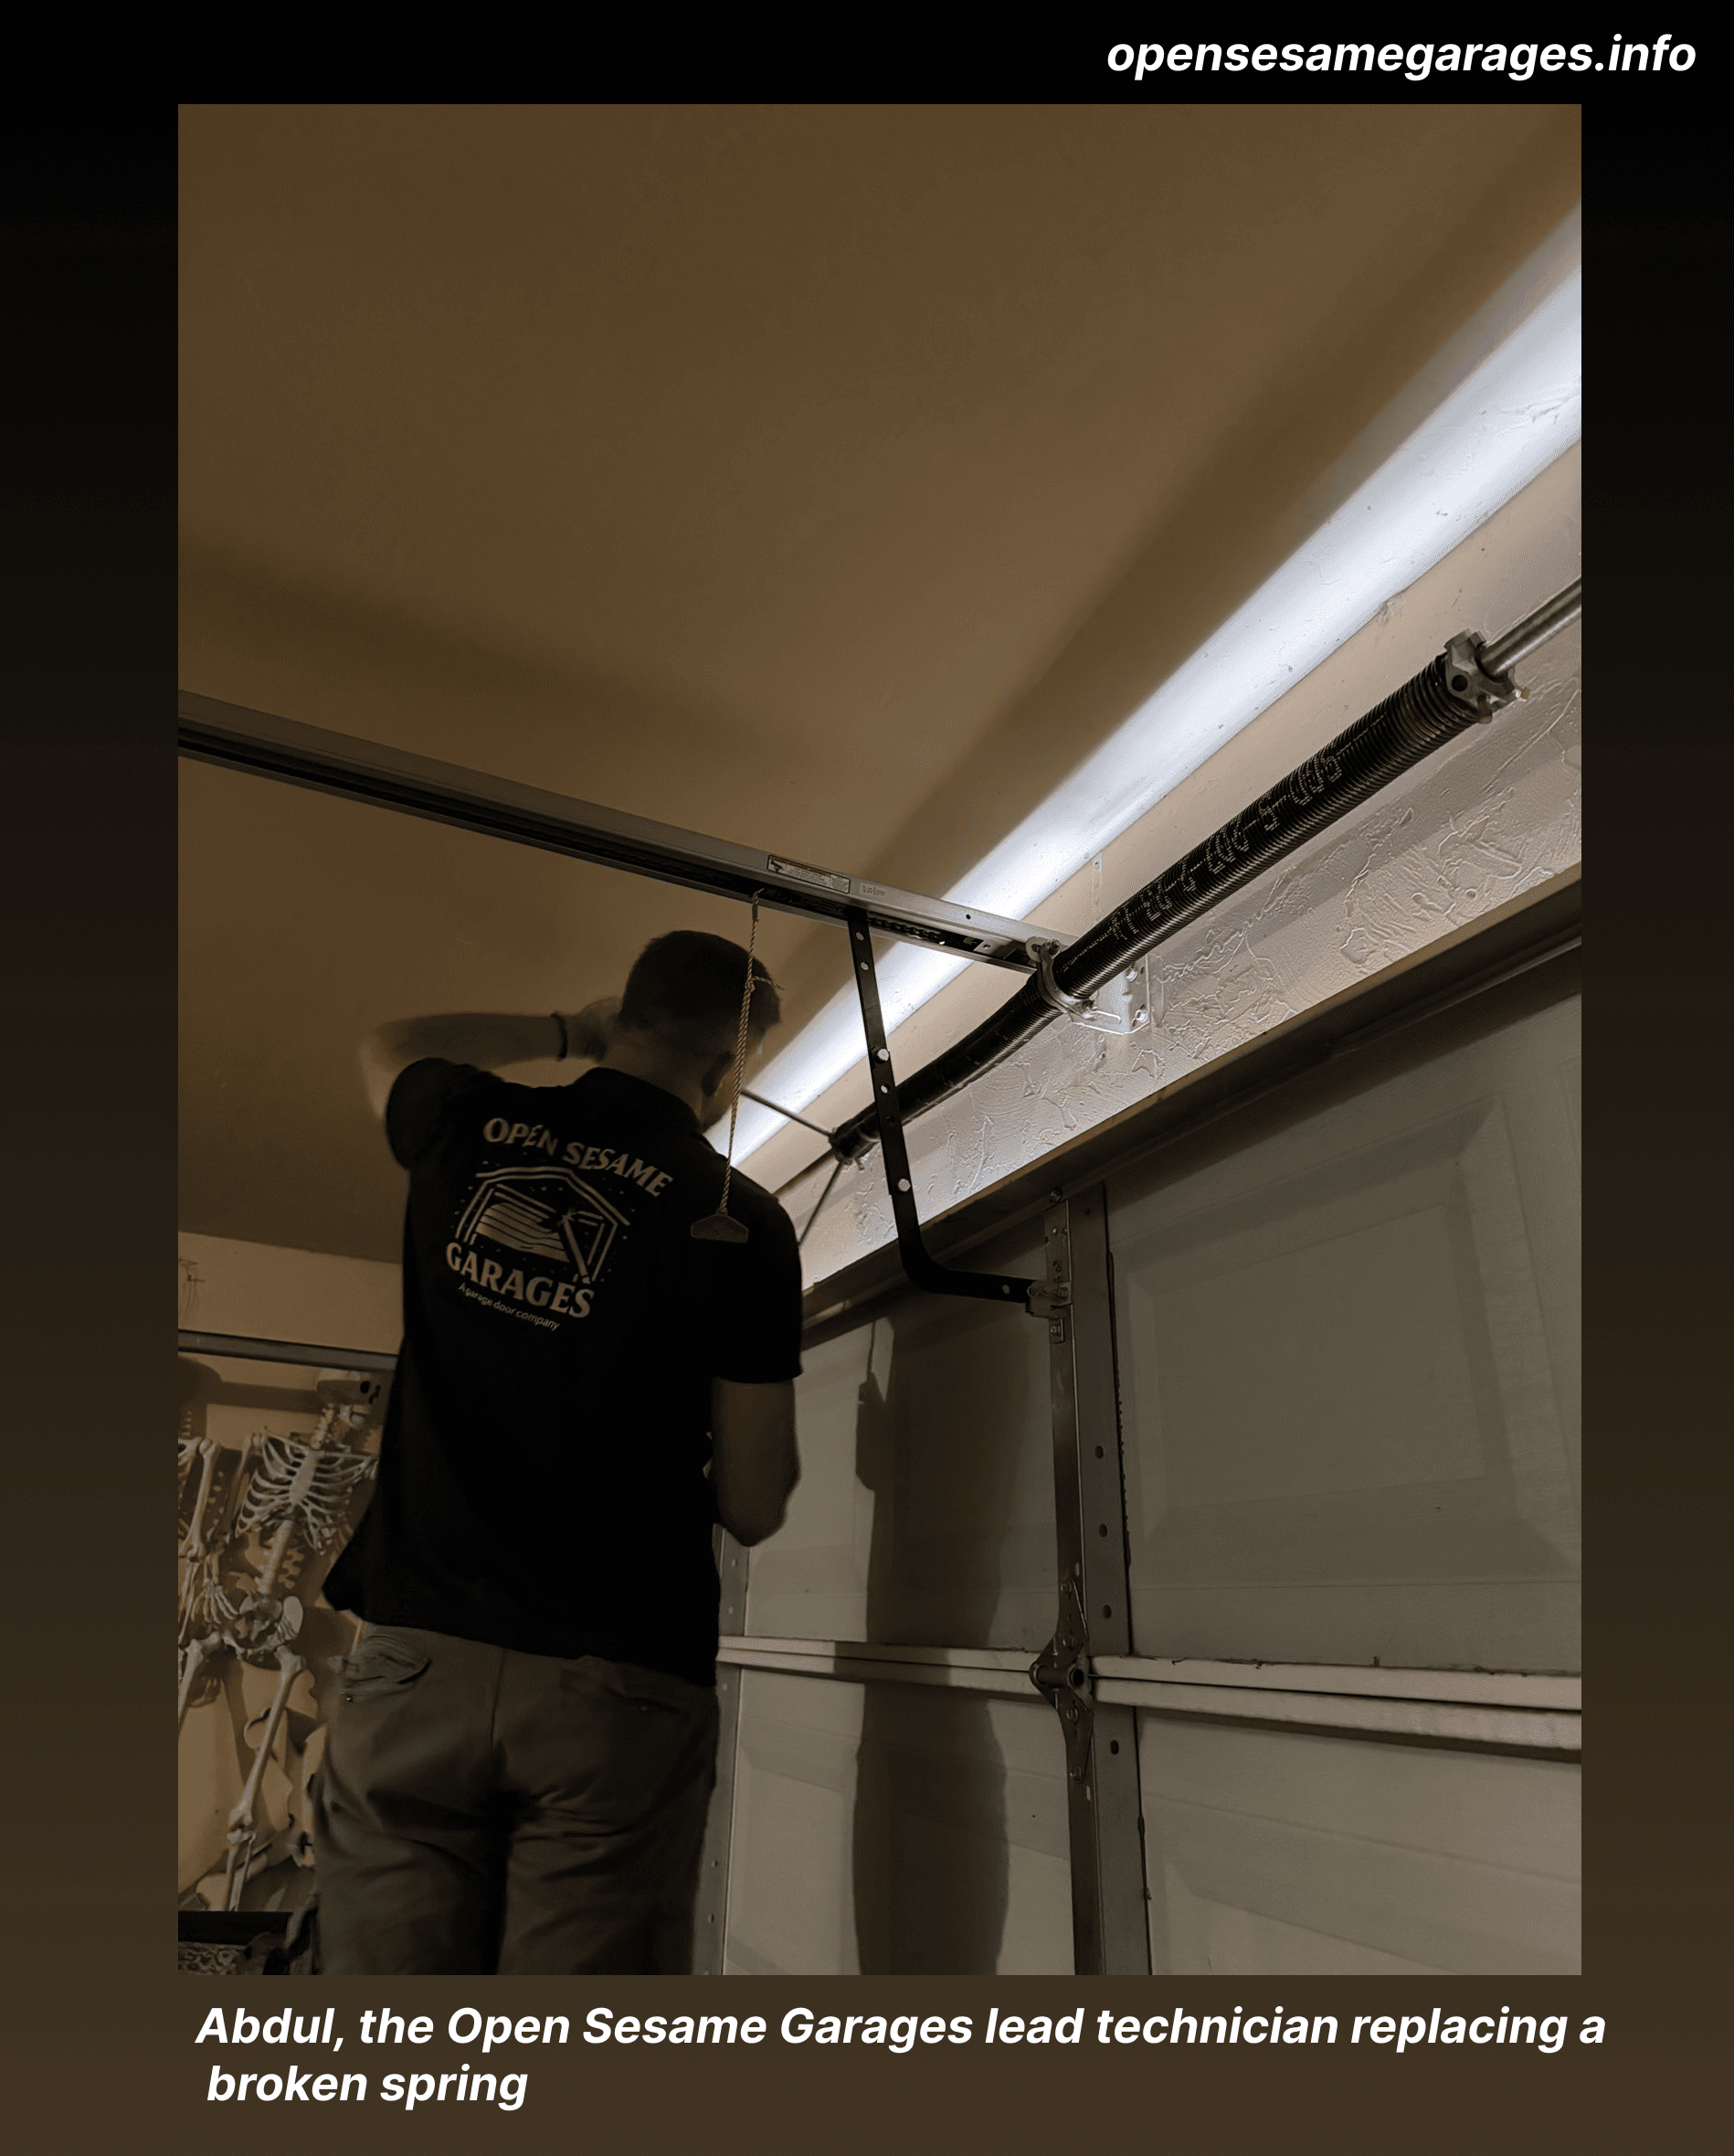
Torsion springs twist. They sit on a steel shaft mounted above the door opening, and as they unwind they turn that shaft, which turns two cable drums in lockstep. One assembly, driving both sides identically.
Not sure which you have? Here is the 10-second way to tell them apart.
Why switch to a torsion spring system?
Safer
A torsion spring is bolted to a steel shaft above the door and stays on that shaft when it fails. An extension spring is stretched along the horizontal track under tension, held by pulleys and cables — when one snaps, the loose end can whip across the garage. That is the reason building codes require a containment cable through every extension spring, and the reason the torsion system has fewer ways to hurt somebody.
Longer lasting
Both spring types are commonly rated around 10,000 cycles, but torsion springs are the only ones you can order in high-cycle versions — 20,000 to 50,000 cycles — for a door that opens six or eight times a day. A torsion system also lets you upsize the wire for a heavy insulated door instead of stacking on more extension springs.
Smoother operation
Torsion springs turn a shaft, and the shaft turns two cable drums at exactly the same rate. Extension springs pull each side independently through a pulley, so the two sides are never perfectly matched. That mismatch is the bounce and side-to-side shake you feel in an older door.
Better balance
Because both cables wind onto drums driven by the same shaft, the door’s weight is distributed evenly across the opening. A balanced door floats when you lift it halfway by hand, which means the opener is moving a door that mostly lifts itself instead of dragging a load it was never sized for.
Lower maintenance
No pulleys, no pulley forks, no safety cables threaded through springs — all parts that fray, seize, or get skipped during inspections. A torsion system has a shaft, two bearings, two drums, and the springs.
More reliable
Fewer moving parts is the whole argument. Every pulley and cable in an extension setup is one more component that can be the reason your door is stuck at 6:40 a.m. on a workday.
What does the conversion actually involve?
This is the part homeowners underestimate. A conversion is not a spring swap — almost every load-bearing part above the door gets replaced. Six steps:
1. Measure the door and the headroom
Before quoting a conversion we measure door height and width, weigh or calculate the door, and check the headroom between the top of the opening and the ceiling. Standard torsion hardware wants about 12 inches, plus a couple more with an opener. Less than that is not a dead end — low-headroom kits work from roughly 9.5 inches and rear-mount torsion goes lower still — but it changes the parts list and the price, so it gets settled before anyone commits.
2. Release and strip the extension system
The door is clamped, the opener is disconnected, and the extension springs are unloaded with the door fully open (that is the position where they carry the least tension). Springs, pulleys, pulley forks, safety cables, and the old lift cables all come out.
3. Mount the center bracket and torsion shaft
A center bearing bracket is anchored into the header above the opening — into solid framing, not drywall or a loose header board. End bearing plates go on both sides, and the torsion shaft is run through all three.
4. Install the matched spring pair and drums
Torsion springs come as a matched left-wound and right-wound pair, sized to the exact weight and height of the door. Each goes on its own side of the center bracket. Cable drums go on the shaft ends, and new lift cables run from the bottom brackets up to the drums.
5. Wind to spec with winding bars
Each spring is wound with solid steel winding bars, a quarter turn at a time, to the turn count that door calls for — roughly 30 quarter-turns on a typical 7-foot door. Then the set screws are torqued onto the shaft.
6. Balance-test, then reconnect the opener
The clamps come off and the door is lifted by hand. A correctly sprung door holds position at the halfway point — no slamming down, no drifting up. Only after it passes that test does the opener get reconnected and the door run through full cycles, with the auto-reverse checked before we leave.
The winding and the center bracket anchoring are the two steps that make this a professional job. A spring holding enough energy to lift a 300-pound door, mounted to a bracket that was screwed into drywall, is a serious hazard — which is why we tell homeowners never to attempt spring work themselves.
How much does it cost, and how long does it take?
Budget $400 to $800 installed for a residential door. The spread comes down to door weight, whether standard or low-headroom hardware is needed, and whether you want standard 10,000-cycle springs or high-cycle springs. Two to three hours on site.
For comparison, a straight spring replacement in the OKC metro runs $150 to $350 per spring. So a conversion is genuinely more expensive on the day — you are buying hardware you do not currently own. What you get back is a system with fewer failure points and a longer service life, which is why we recommend it when a door is already due for spring work anyway. Doing both at once means paying labor once.
Do you have the headroom for it?
Measure from the top of the door opening to the ceiling, or to the lowest obstruction like a joist or pipe. Standard torsion hardware wants about 12 inches, plus roughly 2 more if you have an opener. Below that, low-headroom conversion kits work from around 9.5 inches, and rear-mount torsion assemblies can fit in about 4.5 inches — with the caveat that some side-mount jackshaft openers are not compatible with low-headroom torsion setups. Low headroom does not rule the upgrade out, it just changes the parts list and the price, which is why we measure before quoting.
When converting is not worth it
We would rather talk you out of a job than sell you one you did not need. Four cases where the honest answer is no:
Your extension system is healthy and the door is light
A well-maintained extension setup with intact safety cables on a light single-car door is not dangerous. If nothing is broken, a conversion is an upgrade, not a repair — and $400 to $800 is real money for a door that is working.
You are replacing the whole door within a year or two
A new door comes with a new spring system sized to it. Converting first means paying for hardware that may not match the door you actually buy. Wait, and put the money into the door.
The headroom fight costs more than the benefit
If your ceiling forces a rear-mount torsion assembly, the parts and labor climb and some side-mount jackshaft openers stop being compatible. That is a real trade-off worth hearing about before you spend.
One extension spring just broke and you need the door working today
Replacing the extension pair like-for-like is faster and cheaper on the day. We will tell you that. The conversion is a better long-term answer, not an emergency one — and it will still be there next month.
One case where the answer is close to always yes: if your extension springs have no safety cables running through them, fix that today. A containment cable costs almost nothing next to what an unrestrained extension spring can do when it lets go, and it is the cheapest safety improvement available on a garage door.
Frequently Asked Questions
How much does it cost to convert extension springs to torsion springs?
Expect roughly $400 to $800 installed for a residential door, because the conversion is not just springs — it adds a torsion shaft, a center bearing bracket, two end bearing plates, cable drums, and new lift cables. Straight extension-spring replacement is cheaper on the day; the conversion buys a safer, longer-lived system. Open Sesame Garages quotes the full number upfront before any work starts.
How do I know which spring system my garage door has?
Stand inside the garage with the door closed and look up. One or two thick coiled springs on a steel bar directly above the door means torsion. Long, thinner springs stretched along the horizontal tracks on either side, with cables and pulleys, means extension.
Is converting to torsion springs worth it?
It is worth it if your door is heavy or insulated, opens several times a day, has extension springs missing their safety cables, or already shakes and bounces on the way up. It is not worth it if your extension system is healthy and the door is light, or if you are replacing the whole door soon.
How much headroom do torsion springs need?
Standard torsion hardware needs about 12 inches of clearance between the top of the door opening and the ceiling, plus about 2 more inches for an opener. Low-headroom conversion kits work from roughly 9.5 inches, and rear-mount torsion can go down to about 4.5 inches, though some side-mount jackshaft openers are not compatible with those setups.
How long does the conversion take?
Most residential conversions are a single visit of about two to three hours — longer than a straight spring swap, because the old pulleys and cables come out and the shaft, bearings, and drums go in. The door is left balanced, cycled, and tested before we leave.
Can I convert my garage door springs myself?
We strongly advise against it. A torsion spring holds enough energy to lift a 150 to 300 pound door, and the center bracket has to be anchored into solid framing or the whole assembly can pull out of the wall under load. This is the job professionals get paid for.
Still on Extension Springs? Let Open Sesame Take a Look.
We will measure your headroom, weigh the door, and tell you straight whether a torsion conversion is worth it — or whether replacing what you have is the smarter spend. Free estimates across Oklahoma City and the surrounding metro.
Related Garage Door Guides
- Can I convert my garage door from extension springs to torsion springs? →
- How much does an extension-to-torsion conversion cost? →
- Do extension springs need safety cables? →
- How much headroom do torsion springs need? →
- How long do garage door springs last? →
- Are high-cycle torsion springs worth it? →
- How we replace broken garage door springs: a real job, start to finish →